Getting started guide
From your first sign-in to a released, priced BOM and a pack for your contract manufacturer. Follow the steps in order; the whole tour takes about 15 minutes.
Web version: bomdash.com/guide. Questions: support@bomdash.com. Updated November 2026.
1.Create your account
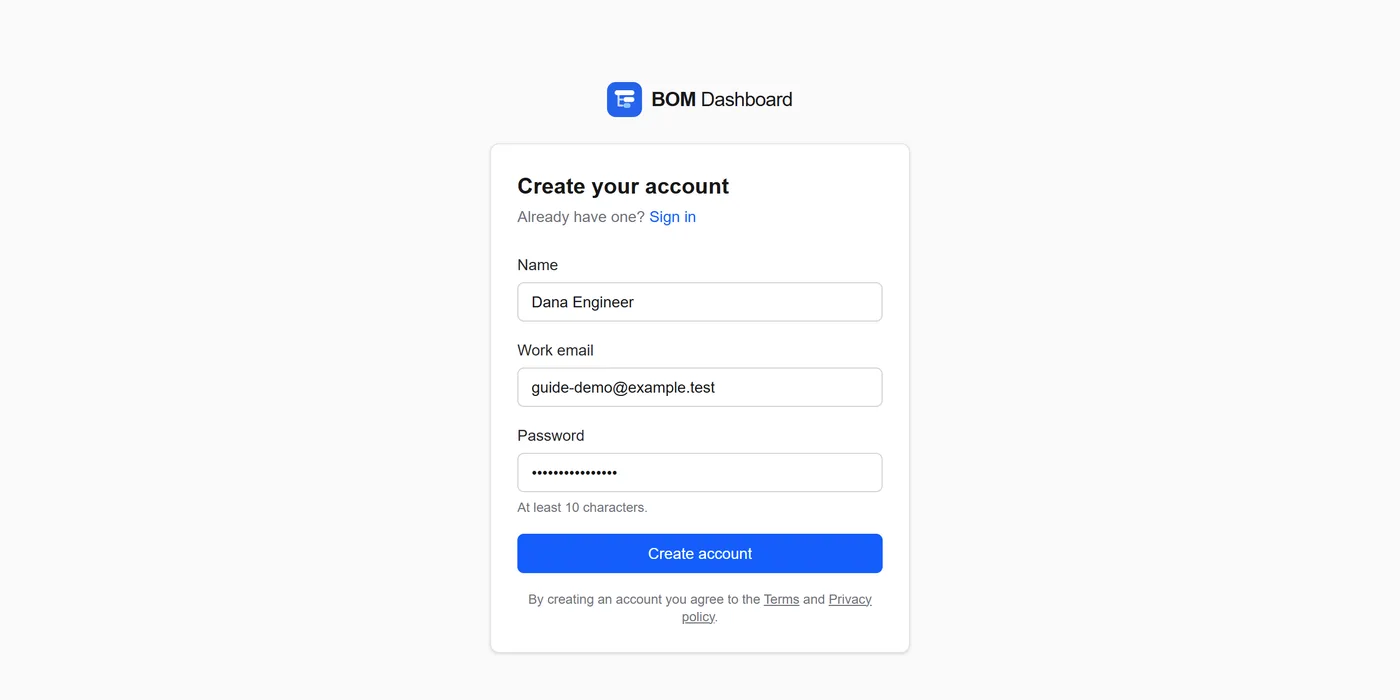
- Go to bomdash.com and click Get started.
- Enter your name, work email and a password of at least 10 characters, then click Create account.
- Open the email from no-reply@bomdash.com and click the link. It signs you in. Check your spam folder if it does not arrive within a minute.
2.Create your organization
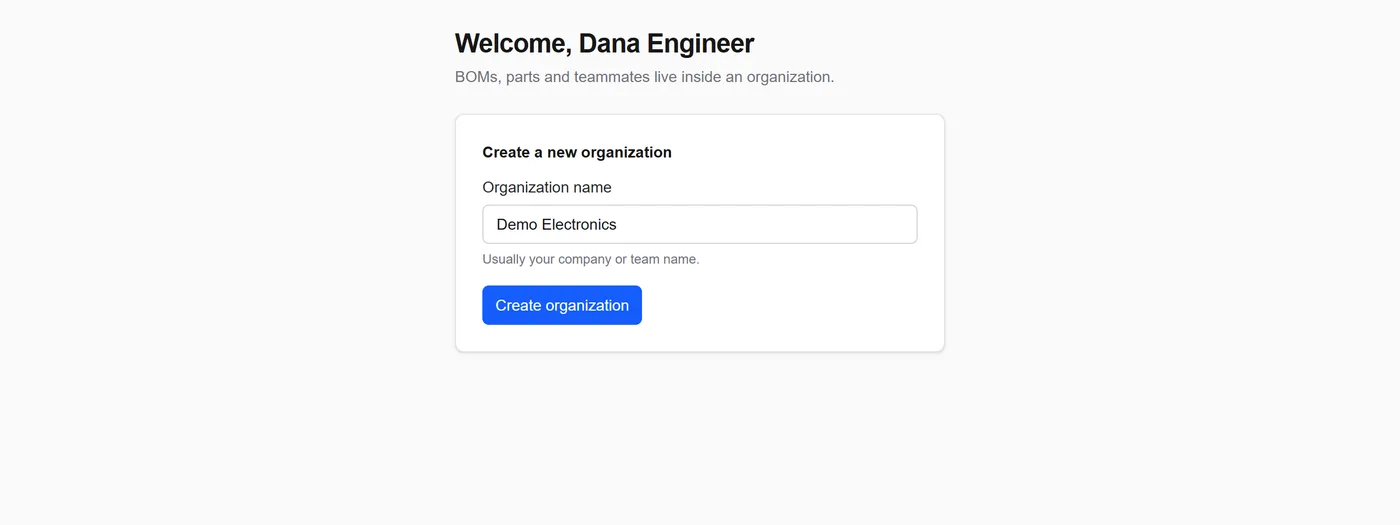
Everything you add belongs to an organization, so teammates can share it.
- Type your company or team name and click Create organization. You become its owner.
- If a colleague already invited you, the invitation appears on this page instead: click it to join their organization.
Tip: You can belong to several organizations. Switch between them with the menu next to the logo, or choose + New organization there.
3.Create an assembly
The dashboard shows a Get started card while your organization is empty. Click Create an assembly, or open Assemblies in the top menu.
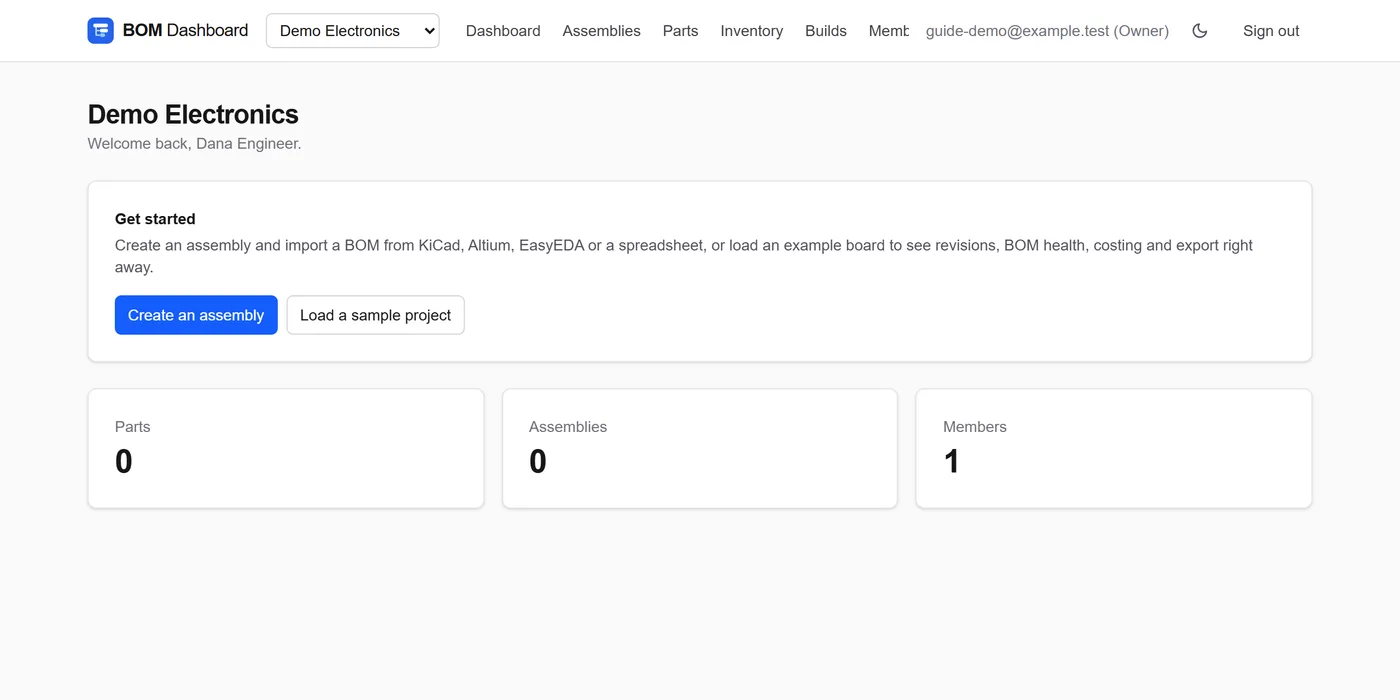
- Under New assembly, enter a number (for example PCBA-0001) and a name. Leave the number blank to get the next ASM-#### number.
- Click Create assembly. It opens at revision A, as a draft.
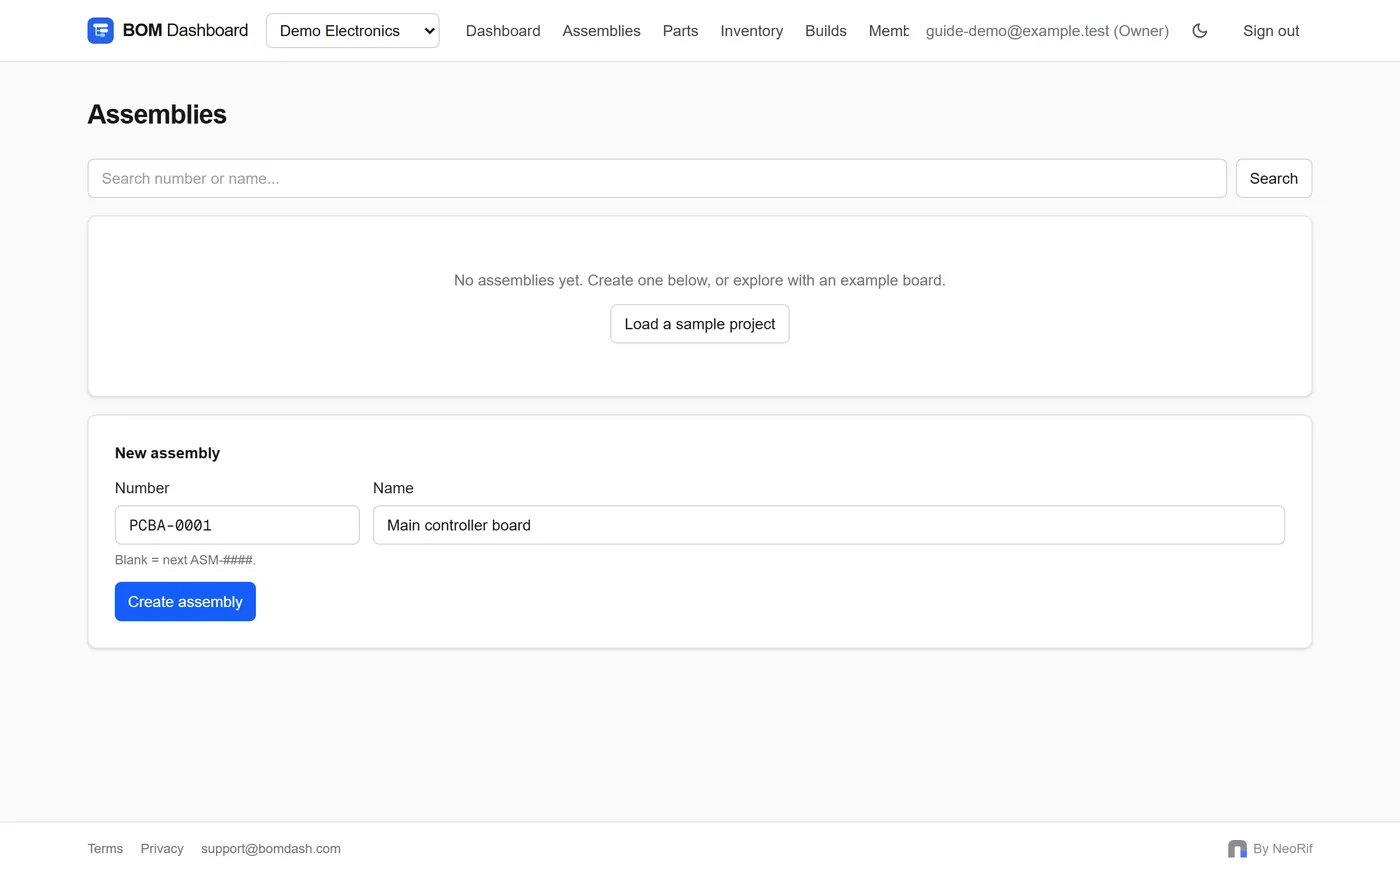
Tip: Just looking? Click Load a sample project. It creates an ESP32-C3 sensor board with real parts. Delete it later from its page with Delete.
4.Import your BOM
First export a BOM from your design tool:
- KiCad: in the schematic editor, Tools > Generate Bill of Materials, and export CSV (grouped by value works best).
- Altium: Reports > Bill of Materials, export as CSV or Excel.
- EasyEDA: Fabrication > BOM (or Export > BOM), as CSV.
- Any spreadsheet (CSV, TSV, TXT or XLSX, up to 4 MB) with columns such as reference, quantity, value, MPN and manufacturer.
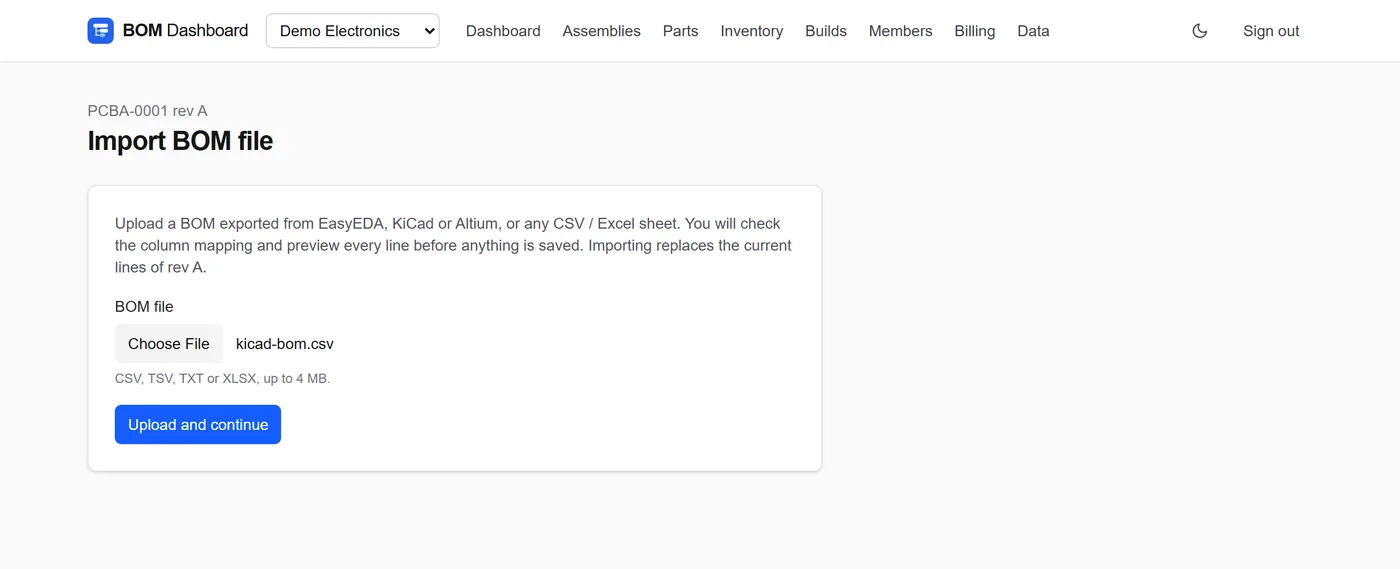
- On the assembly page, click Import BOM file, choose your file and click Upload and continue.
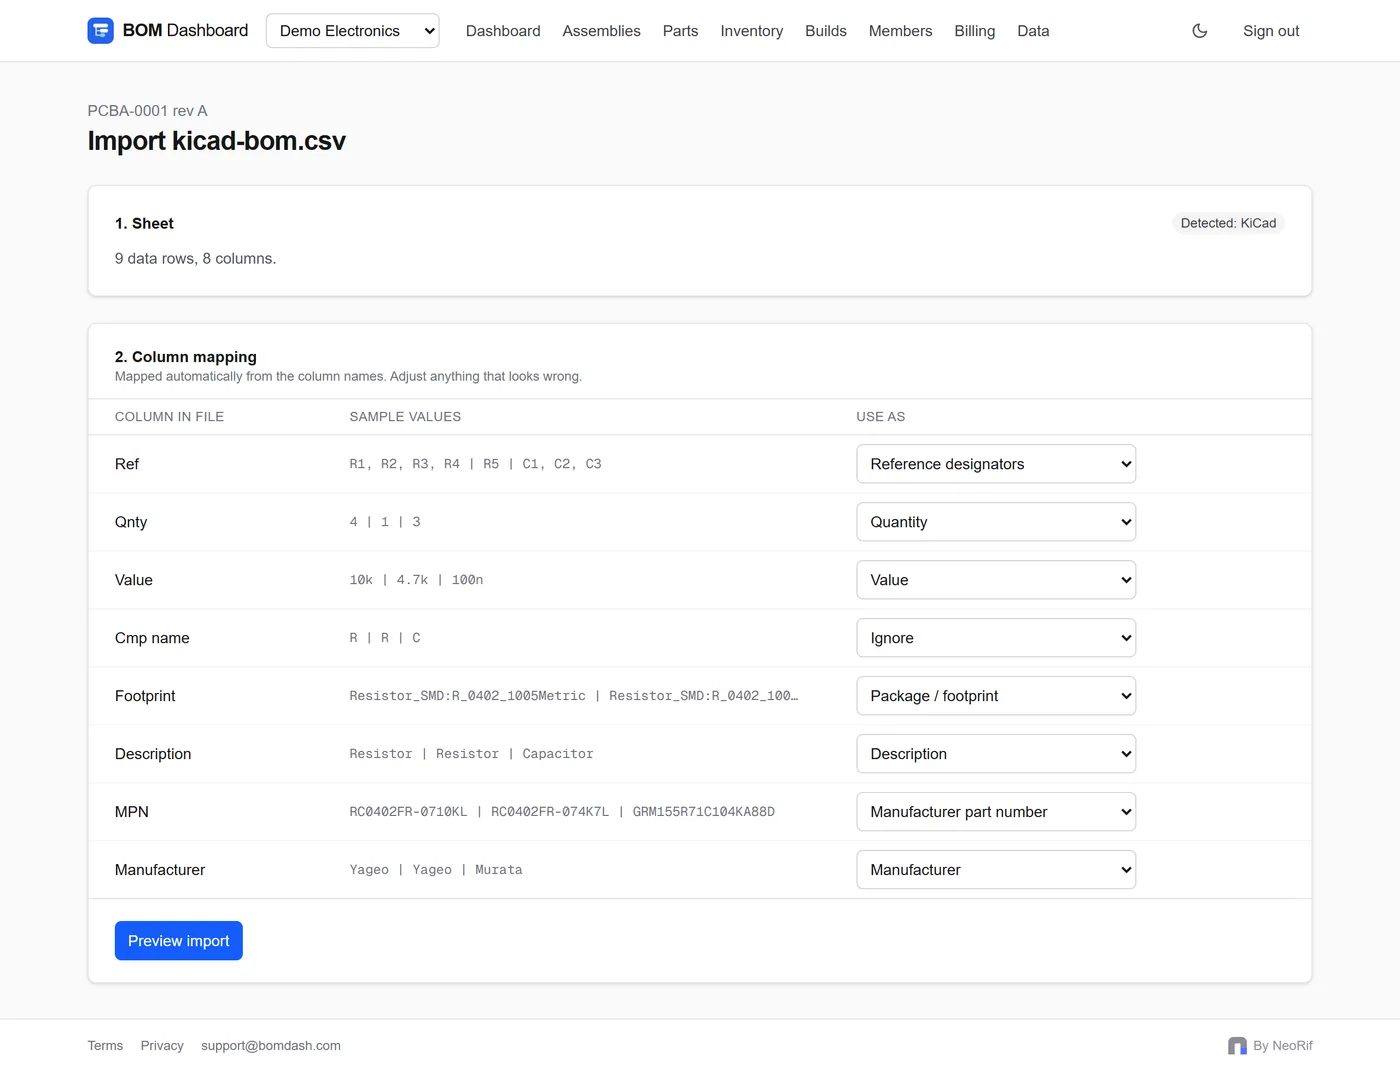
- Column mapping. The tool is detected and each column is mapped automatically. Check the Use as column and correct anything that looks wrong; set columns you do not need to Ignore. Then click Preview import.
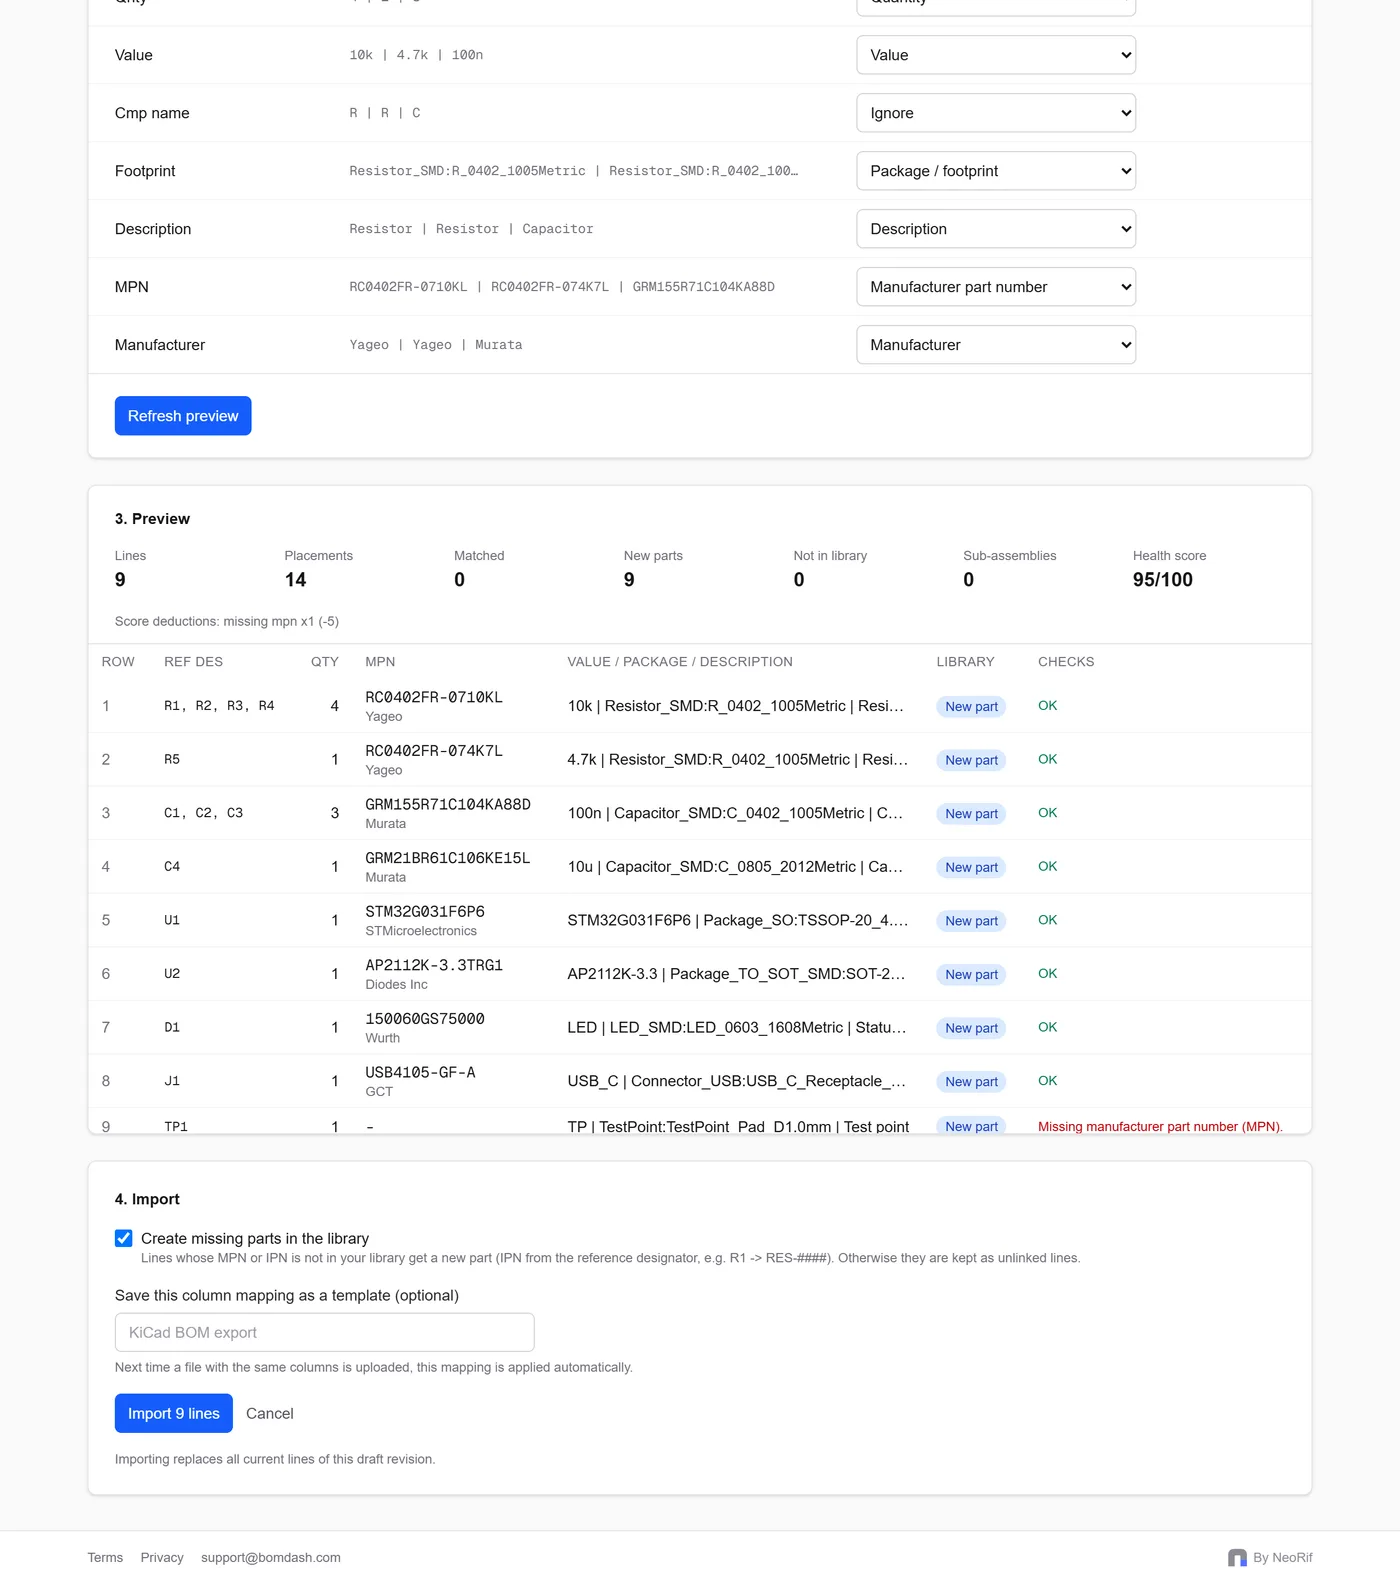
- Preview. Each line shows whether its part is already in your library (Matched) or will be created (New part), and any problems. Reference designator ranges such as R1-R8 are expanded and counted against the quantity.
- Keep Create missing parts in the library ticked so every line gets an internal part number. Optionally save the mapping as a template; the next file with the same columns is mapped for you.
- Click Import. Importing replaces all lines of this draft revision, so you can re-import a corrected file at any time while it is a draft.
5.Review the BOM and its health
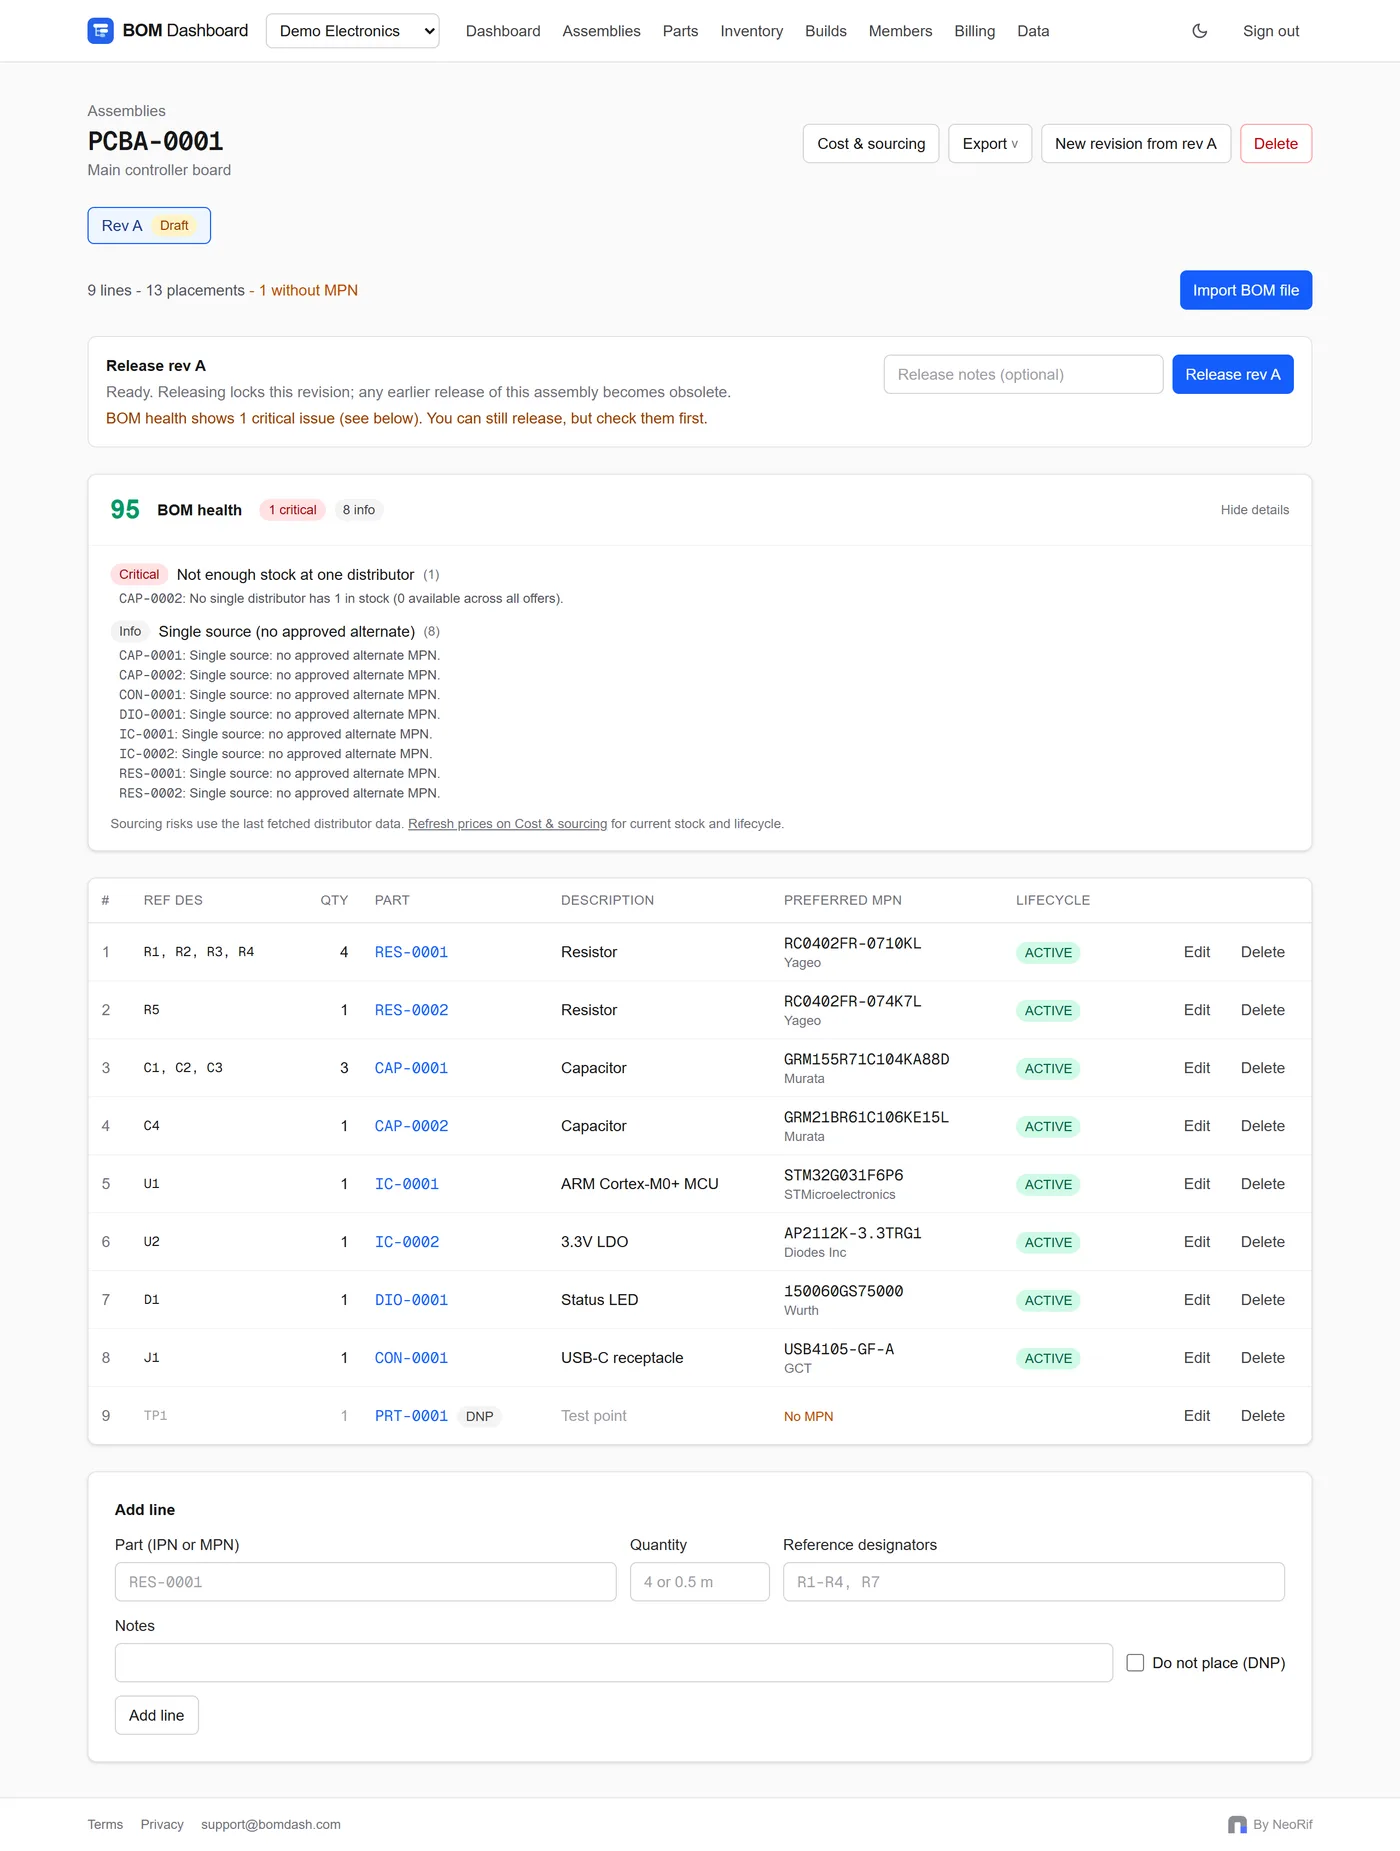
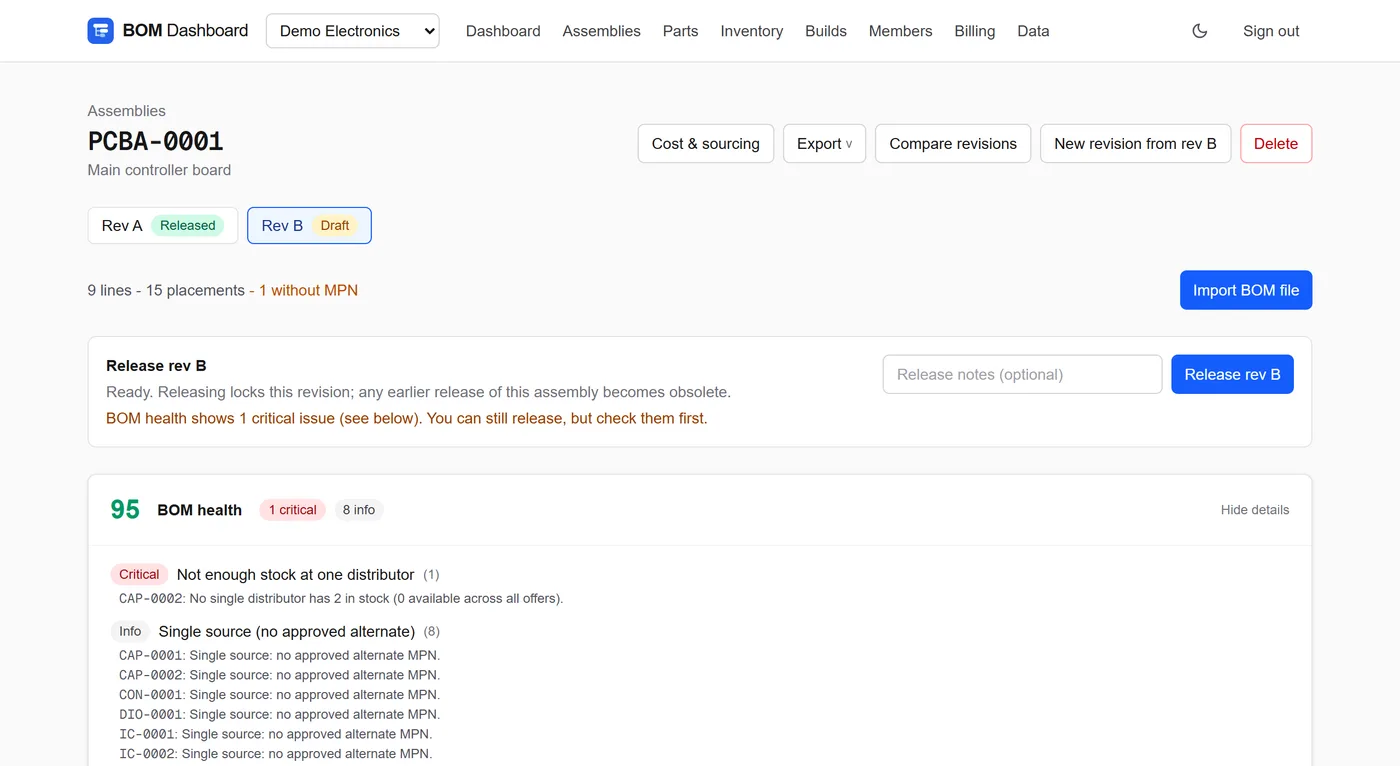
The assembly page now lists every line with its part, preferred MPN and lifecycle.
- BOM health gives a score out of 100 and groups the reasons: critical (for example missing MPNs, reference designator and quantity mismatches, obsolete parts or no stock anywhere), warnings (end-of-life soon, long lead times, prices not fetched yet) and info (single-source parts). Fix critical issues before you release.
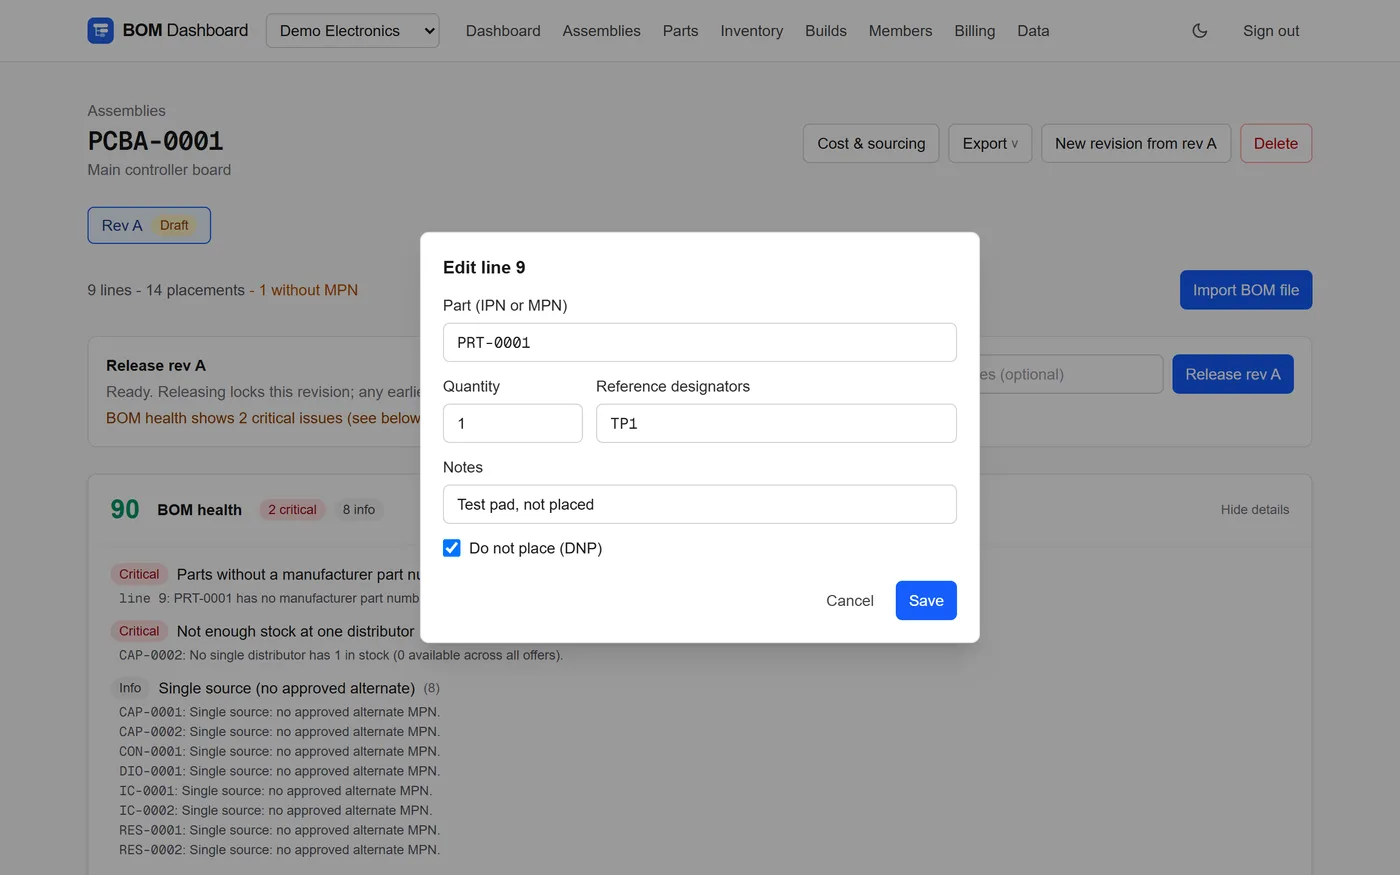
- Click Edit on a line to change its part, quantity, reference designators, notes or DNP. Delete removes a line, and Add line at the bottom adds one by IPN or MPN.
6.Prices, stock and cost
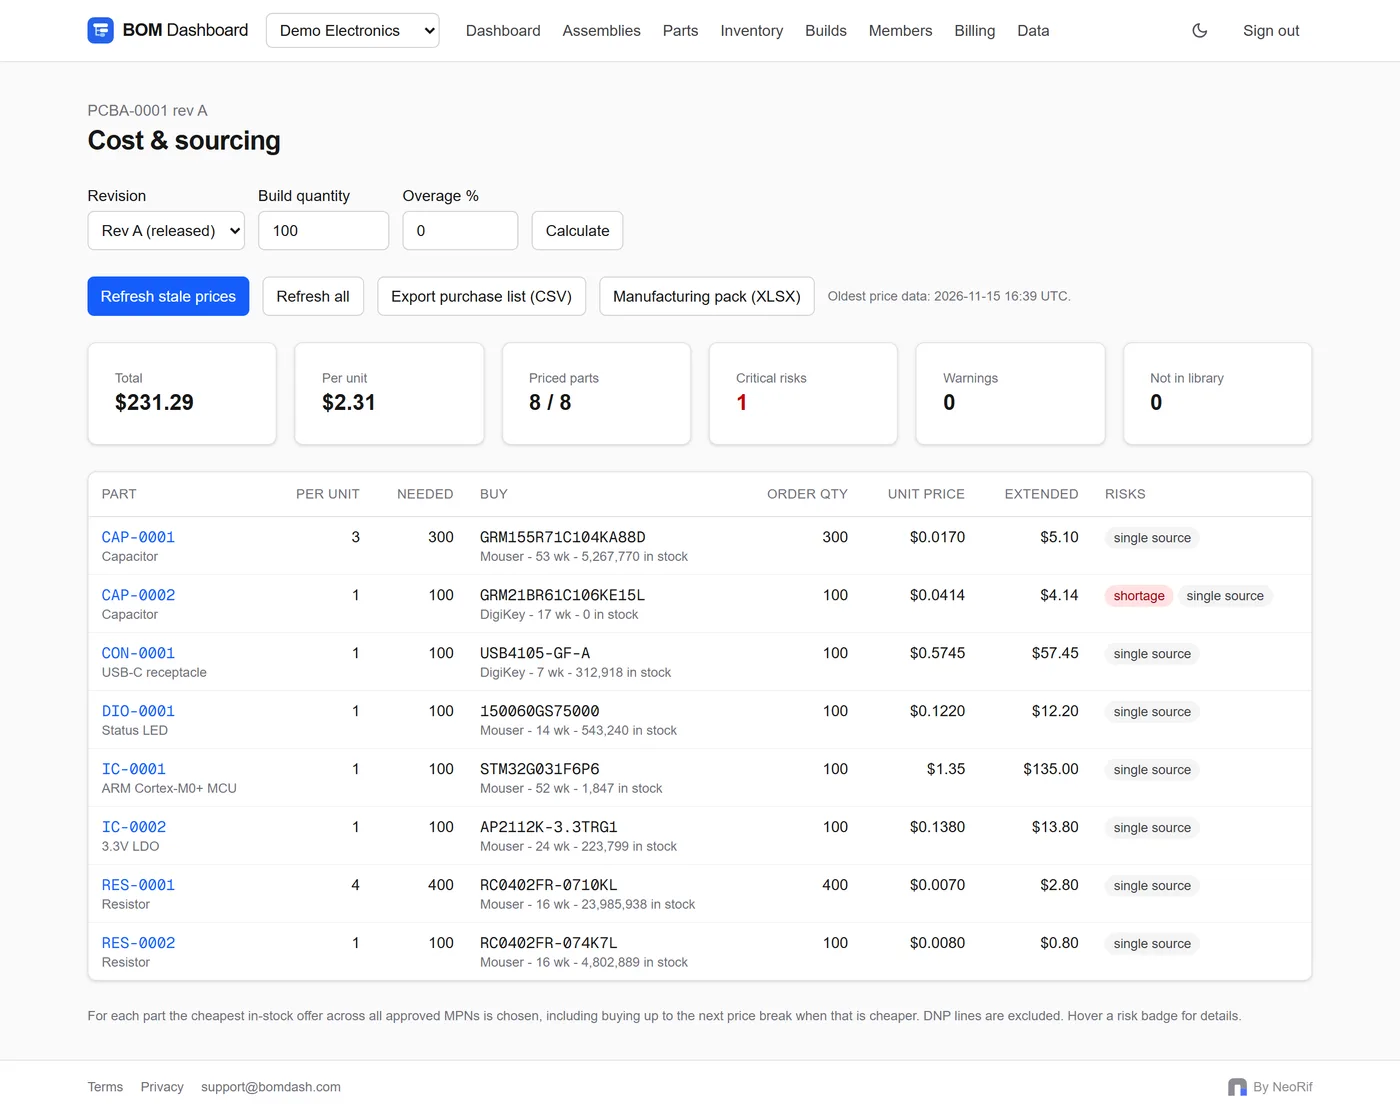
- On the assembly page, click Cost & sourcing.
- Click Refresh stale prices (or Refresh all). Live price breaks, stock, lead time and lifecycle come from DigiKey and Mouser. Each result shows its distributor and when it was fetched.
- Set the Build quantity and an Overage % for spares, then click Calculate. For each part the cheapest in-stock offer across its approved MPNs is chosen, including buying up to the next price break when that is cheaper.
- Check the Risks column: shortage, no offer, obsolete, long lead time, single source. Hover a badge for details.
Tip: Prices are in USD and come straight from the distributors; nothing is estimated. Always confirm with the distributor before ordering. Each plan includes a daily number of price lookups; results are cached and shared, so refreshing is cheap.
7.Export and the manufacturing pack
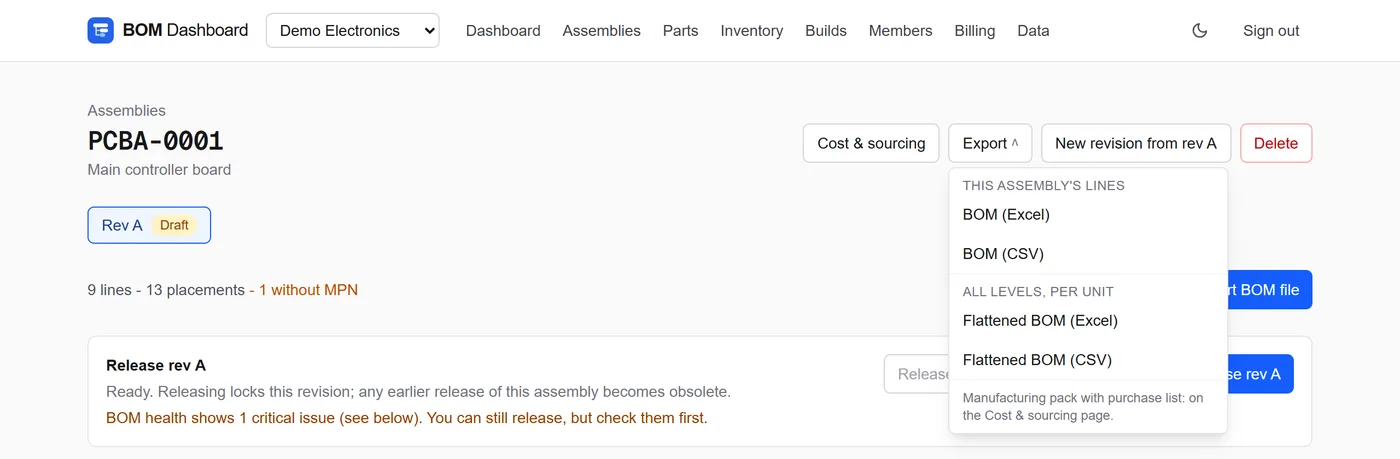
- Export on the assembly page downloads the BOM of the selected revision as Excel or CSV, either this assembly's own lines or flattened: every part across all sub-assembly levels, combined per part, quantities per one unit.
- On Cost & sourcing, Export purchase list (CSV) gives what to buy from which distributor, and Manufacturing pack (XLSX) gives one workbook for your contract manufacturer: a summary, the flattened BOM, the BOM by level and the purchase list for your build quantity.
8.Release a revision
Releasing locks a revision so everyone builds from the same BOM.
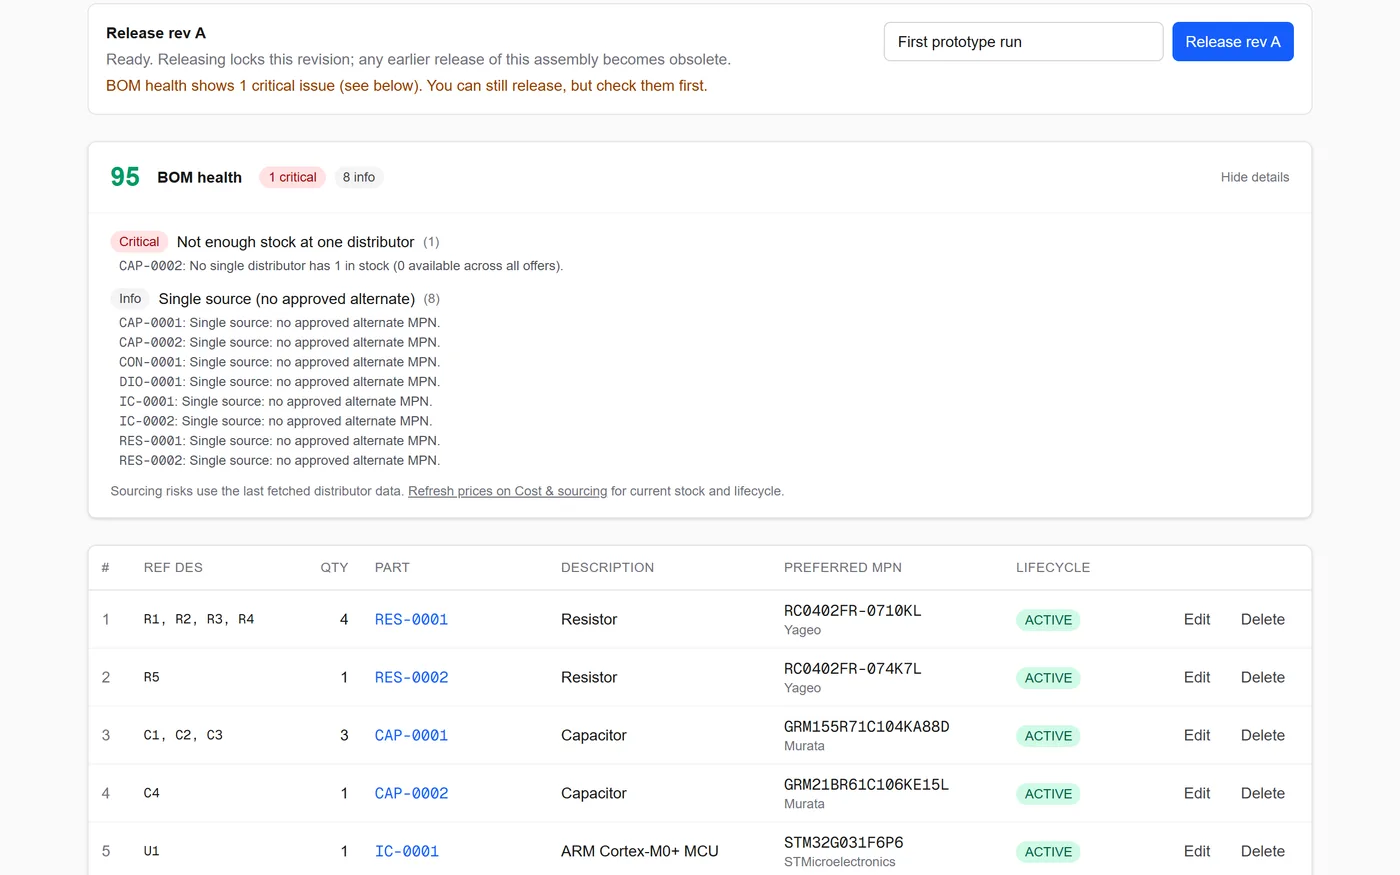
- In the Release rev A panel, add optional release notes and click Release rev A. You are warned if BOM health shows critical issues; you can still release.
- The revision becomes Released and read-only. Releasing a newer revision later marks the older one Obsolete.
Tip: Only approvers, admins and owners can release. Engineers prepare drafts.
9.Change and compare revisions
- Click New revision from rev A. Revision B starts as a draft copy of A.
- Make your changes in rev B: edit lines, add or delete them, or import an updated file.
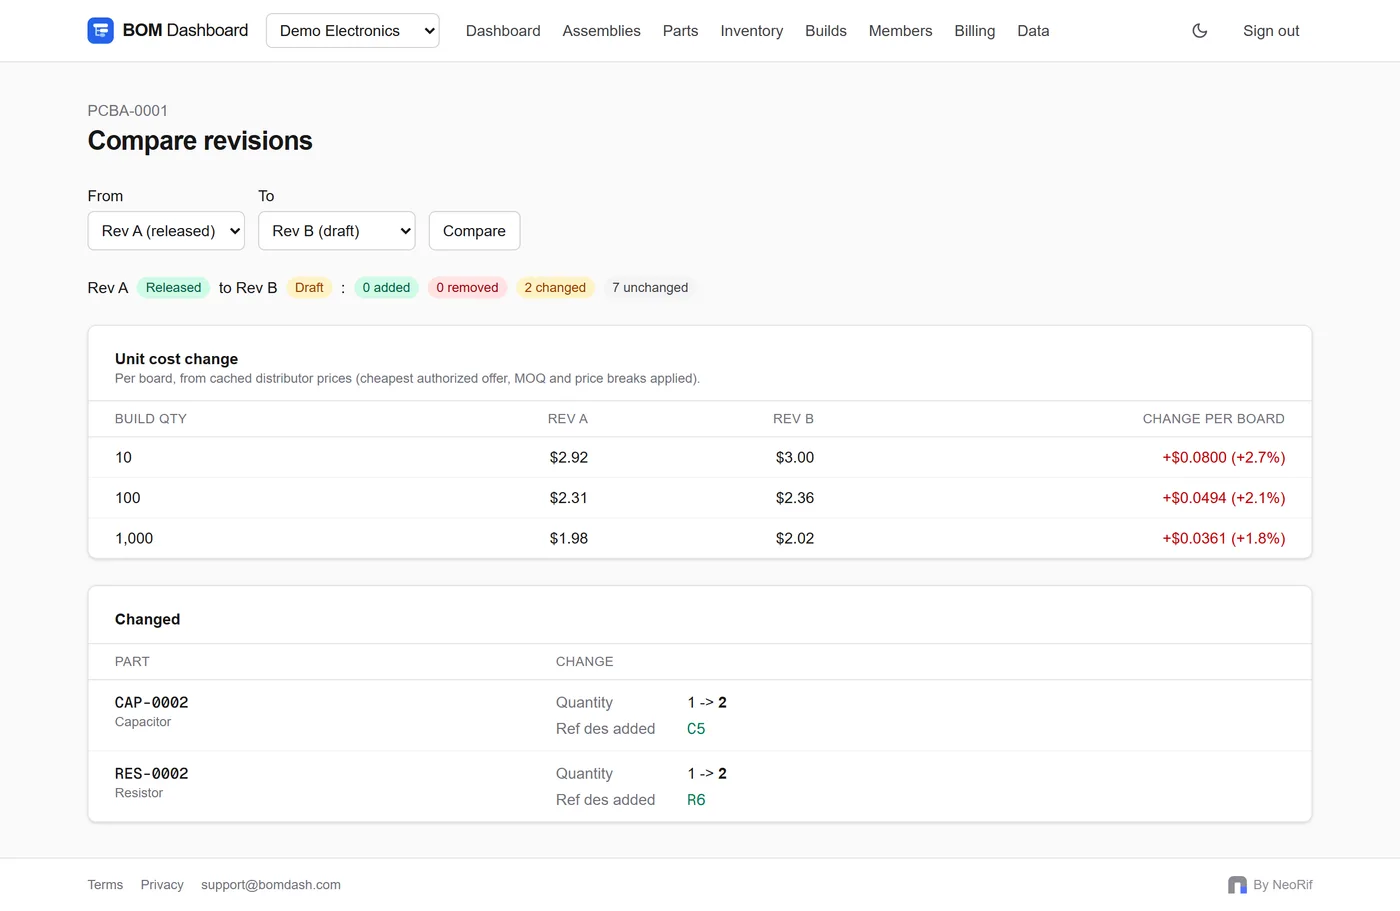
- Click Compare revisions. You see added, removed and changed parts (quantity, reference designators, part swaps) and how the unit cost changes at 10, 100 and 1,000 boards.
10.Parts library and alternates
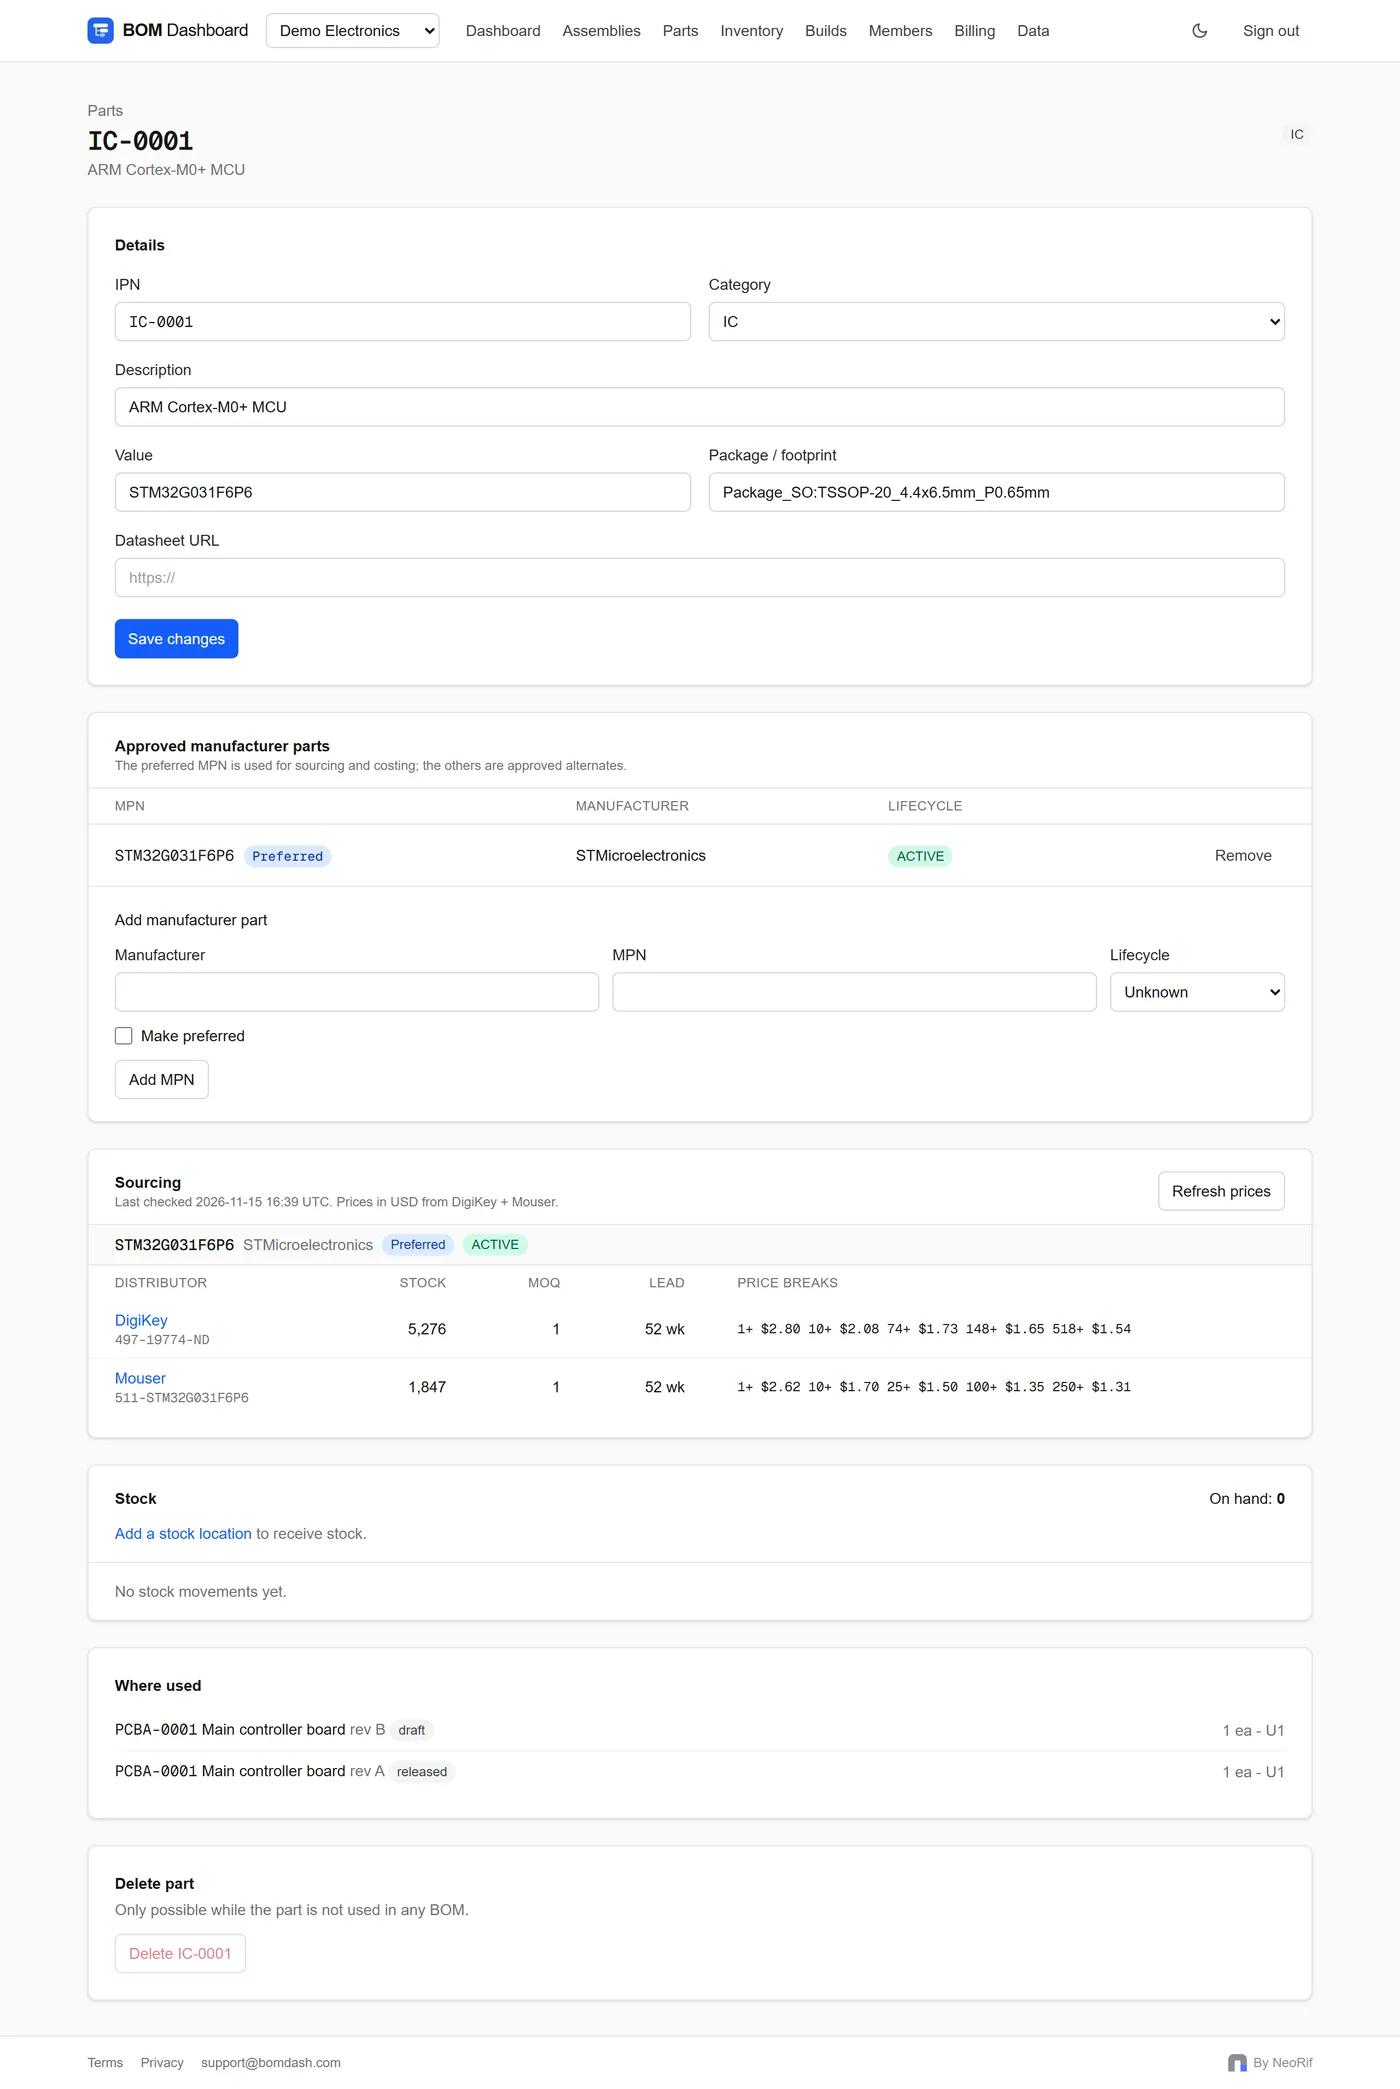
Parts lists every part in your organization. Open one to see its approved manufacturer part numbers (the AML), distributor offers, attributes and where used: every BOM that contains it.
- Add an approved alternate MPN to a part and mark one as preferred. Costing then picks the cheapest in-stock MPN, and the part is no longer single-source.
- Create parts by hand with New part, or let imports create them.
11.Invite your team
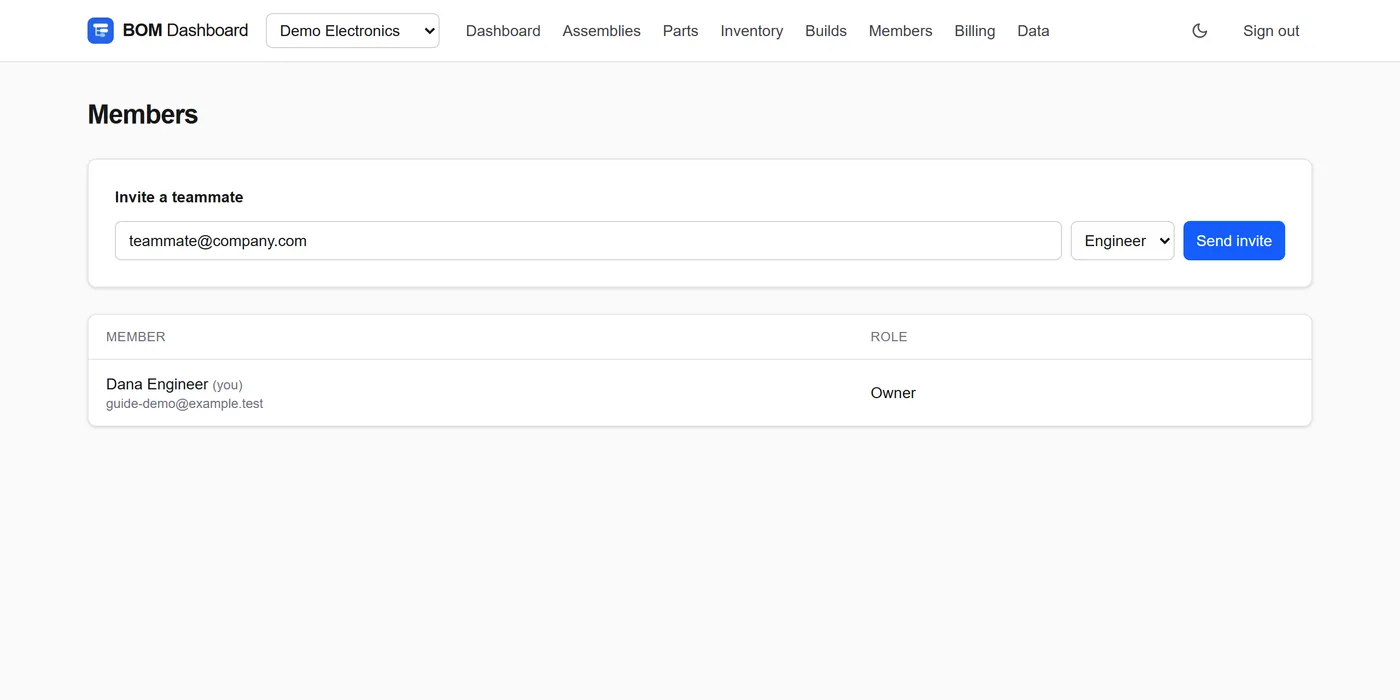
- Open Members, enter a teammate's email, choose a role and click Send invite.
- They get an email, sign up or sign in with that address, and join your organization.
| Role | Can |
|---|---|
| Viewer (free) | See everything and download exports. Cannot change data. |
| Engineer | Create and edit parts, assemblies, draft revisions and imports; receive and adjust stock; plan builds. |
| Approver | Everything an engineer can, plus release revisions and complete builds. |
| Admin | Everything above, plus manage members and download all data. |
| Owner | Everything, including billing and deleting the organization. |
12.Inventory and builds
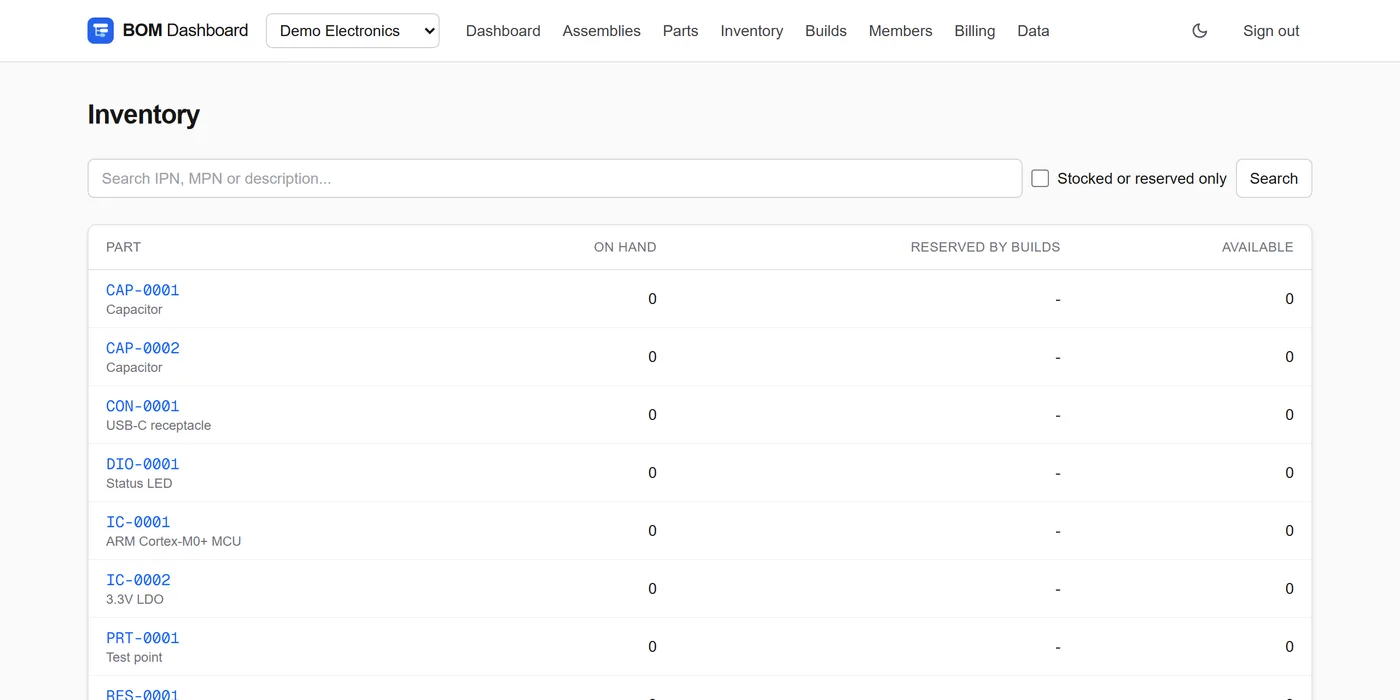
- Inventory: create stock locations, then receive or adjust stock per part. Every movement is recorded.
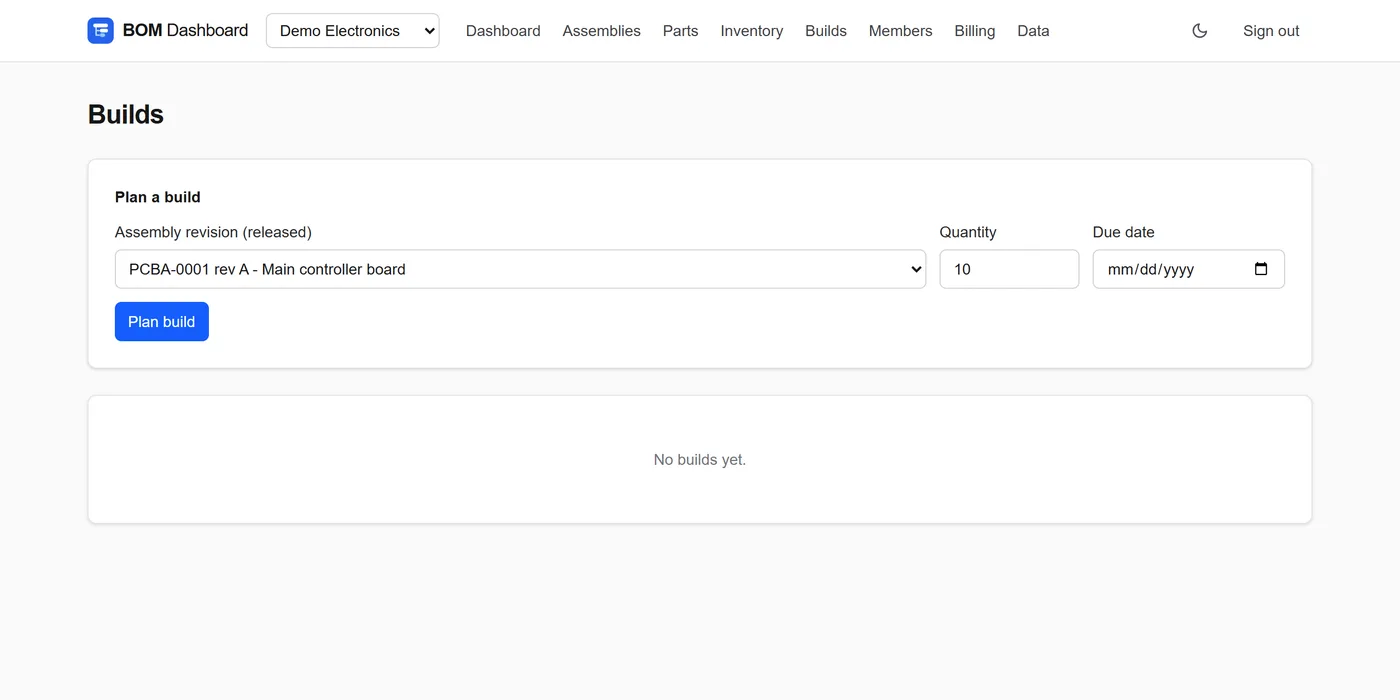
- Builds: plan a build of a released revision and quantity. It shows shortages against your stock, reserves what you have, and consumes the parts when an approver marks the build complete.
13.Plans, billing and your data
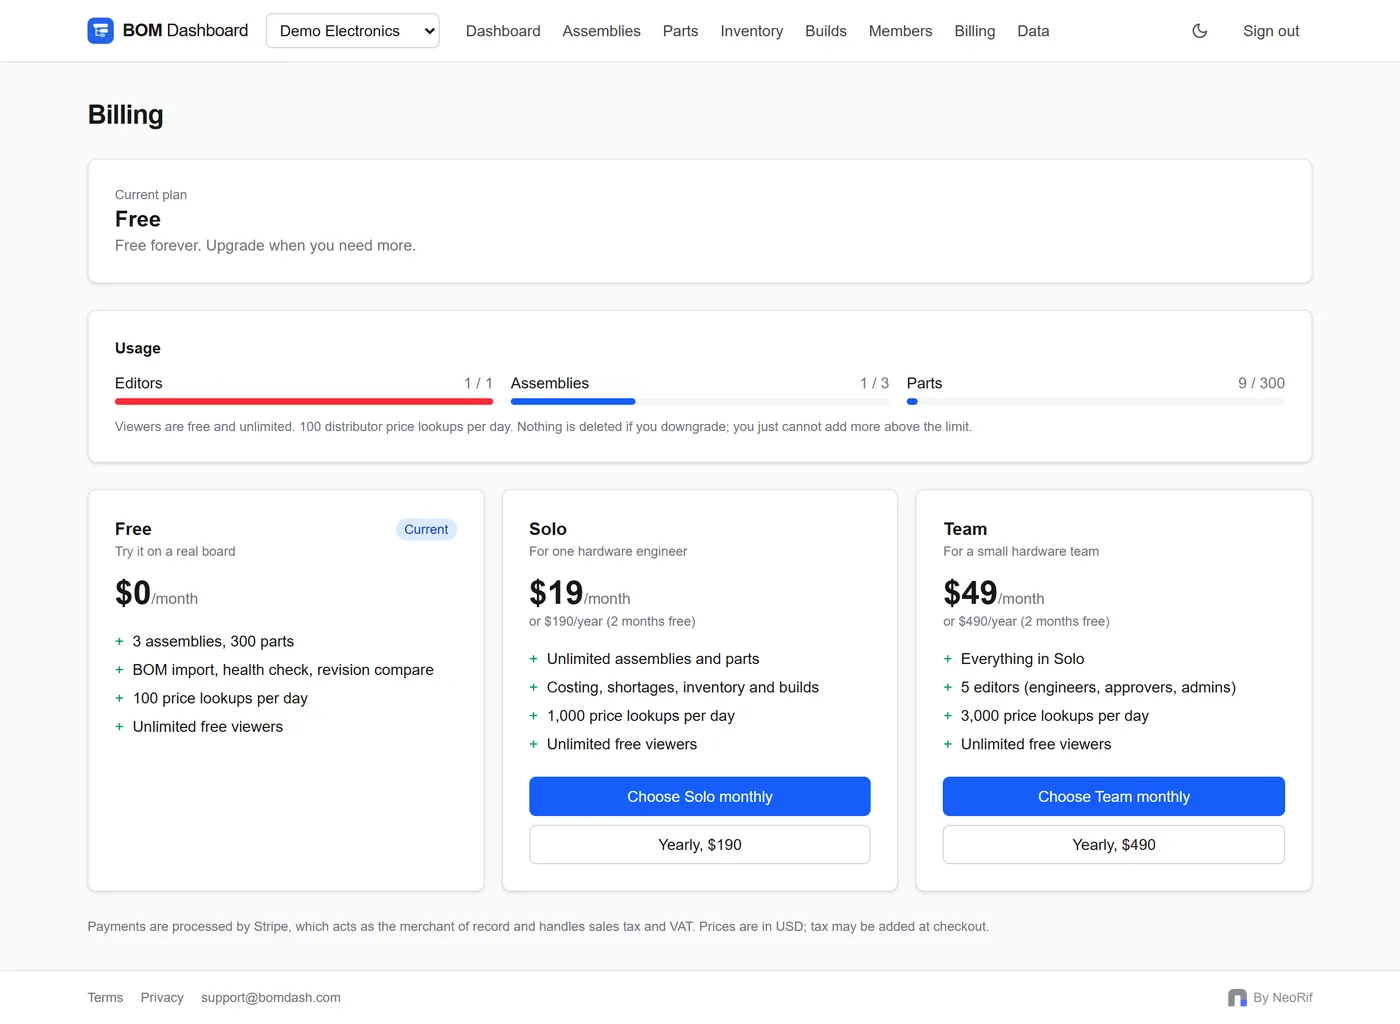
- Billing shows your plan, usage and limits. The owner upgrades to Solo or Team there; payment is handled by Stripe. Viewers are always free. Downgrading never deletes data.
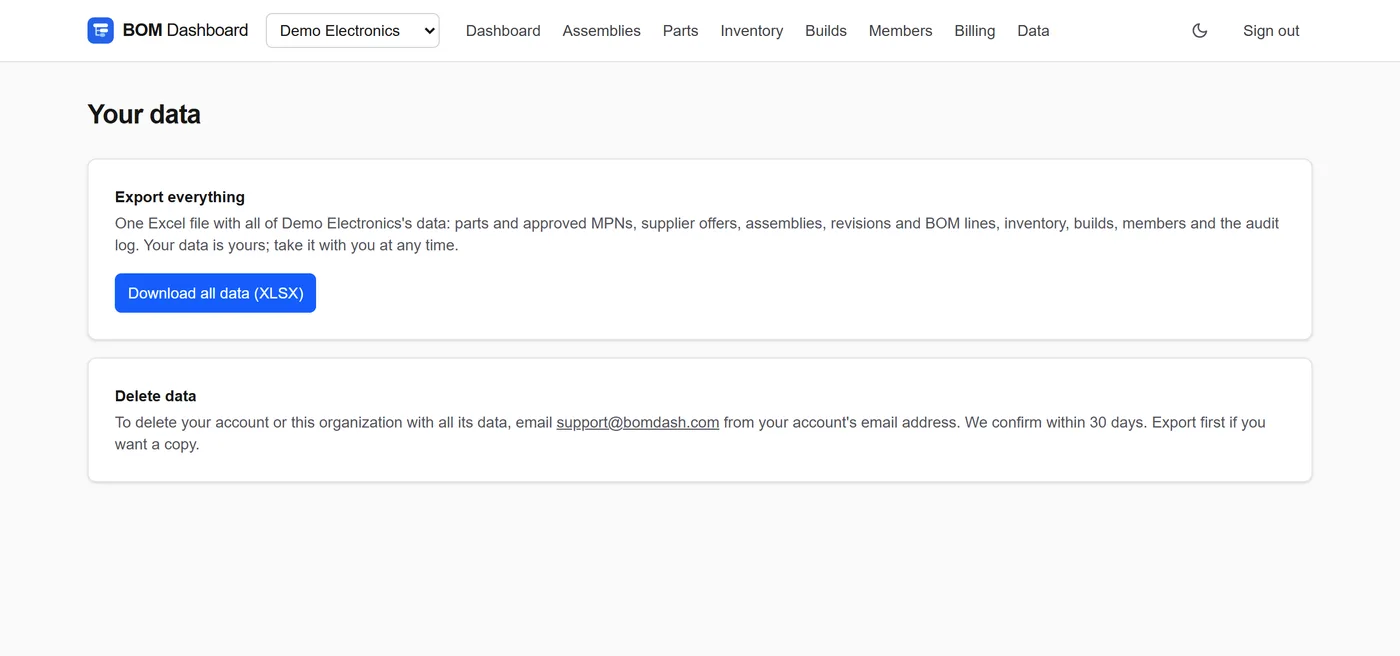
- Data (owners and admins) downloads everything in your organization as one Excel workbook: parts, MPNs, offers, assemblies, revisions, BOM lines, inventory, builds, members and the audit log.
14.Free BOM check (no account)
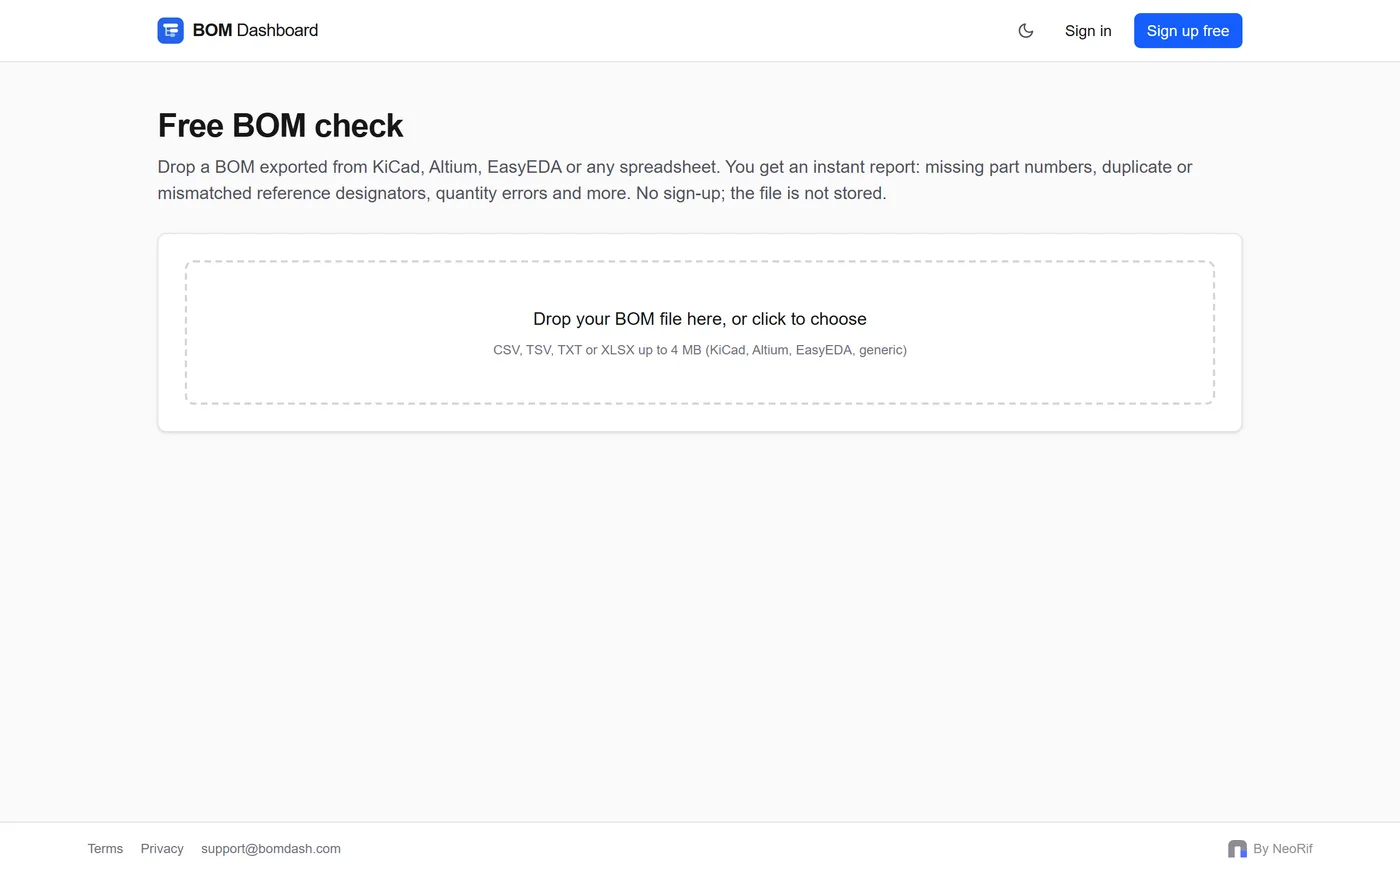
Want a quick look at a BOM without signing up? Open bomdash.com/check, drop in a file and get a health report in seconds. Nothing is stored.
Need help?
Email support@bomdash.com with what you tried and, if possible, the BOM file.